Using DoN’s Mesh Painting Plugin
The basic workflow involves using a Paint node in your blueprints/code (for creating your effects) with a Material UV node in your materials (for rendering the effects).
Depending on the mesh, type of effect, etc, various Paint and UV nodes are available and can be combined in different ways. Finally, If you’re interested in driving gameplay from painted pixels, a Query node can be used to leverage paint blob collisions.
Step 1) To get started, open your context menu and search for “Don Mesh Paint” to see the list of Paint nodes available:
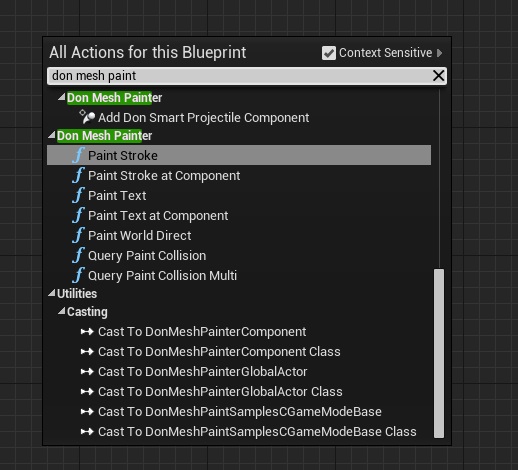
(C++ users will find the same API exposed in DonMeshPaintingHelper.h)
Step 2) Paint Stroke is the most common paint node you’ll be using. You need to provide a HitResult (from collisions, cursor hits, etc) and the paint effect will be routed to all materials of the hit component, assuming they have a Don UV node setup.
Here’s what a paint node looks like:
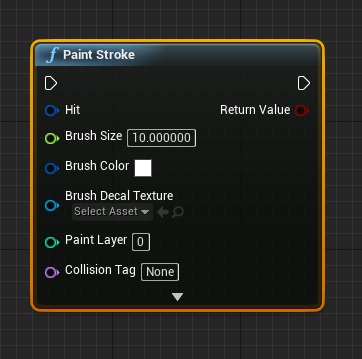
See the Paint Nodes Reference page to learn more about the various painting nodes available and the parameters that you can control.
Inside the Material Editor
After your code/blueprints is setup to paint effects, you’ll need to configure the materials on your character/mesh for receiving paint. You can reuse any of your existing materials and effects as you like, there is no need to create a new material.
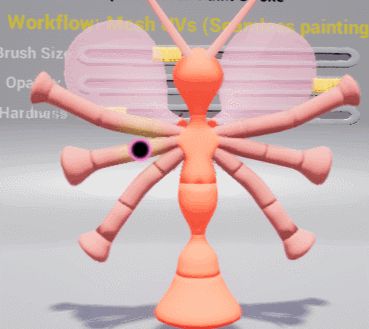
Step 3) In your Material Editor, open the palette to your right and search for “Don” to see the list of UV workflows available.
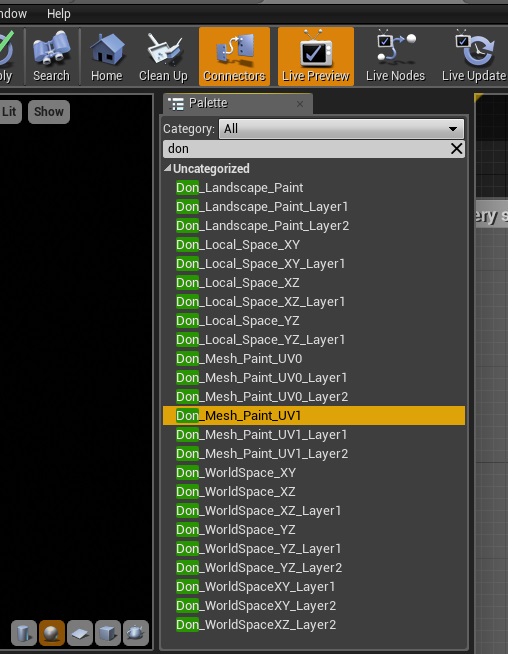
Which UV node should I choose for my material?
It depends on what kind of mesh you’re painting and the overall effect you’re going for, but here’s a quick cheat-sheet:
- Characters will typically need Don_Mesh_Paint_UV1 (We use UV1, not UV0; characters need a dedicated lightmap UV)
- Landscapes: Don_WorldSpace_XY is ideal
- Floors: Don_Local_Space_XY
- Walls: Don_Local_Space_XZ
For a comprehensive treatment of this subject, be sure to read the articles Which UV Workflow should i choose? and Preparing your Mesh for painting.
Step 4) Let’s see what a UV node looks like in action:
In this example from the sample project, we have a character that is receiving a Lava effect on Hit. Observe how the effect is sourced from the Don Mesh Paint node’s Alpha channel and blended in:
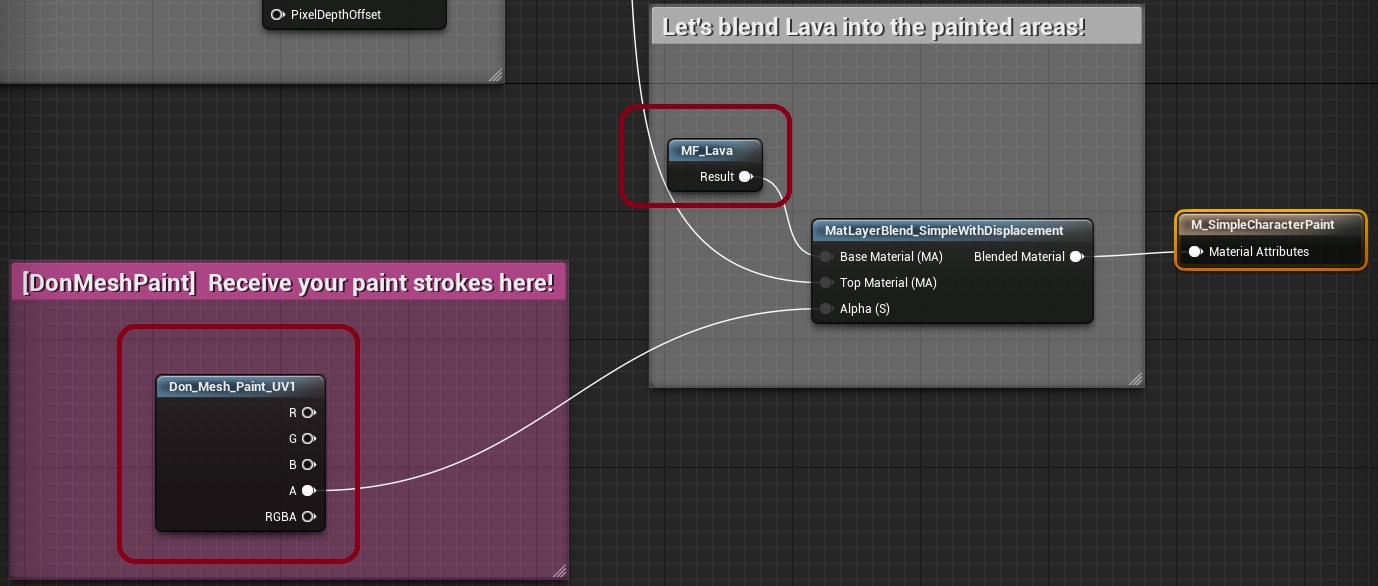
Note 1: To enable a single “Material Attributes” input as used by the M_SimpleCharacterPaint node above (instead of the regular material output pins), you can simply click on that node and check the “Use Material Attributes” in the Details Panel.
Note 2: The plugin does not require you to change your existing material setups in this manner. The above setup is purely for visual cleanliness; if you prefer you may continue using the regular material output pins and blend in any channels you’re interested in using.
Putting it all together
Here’s a finished example from the sample project in action.
This example works by first taking the UMG reticle position and obtaining a Hit Result from it (see U_SimpleHUD in the sample project). The demo pawn then supplies this Hit to PaintStroke (see BP_PainterPawn). Finally, the materials of the skeletal mesh (see M_SimpleCharacterPaint) are configured to receive paint in the form of mesh-space UVs.
Sample Project Downloads
4.18 https://drive.google.com/open?id=1xj79l9ZvXirV92eBb4vtAbLvhZCbAA3n
4.17 https://drive.google.com/open?id=0ByqN_J5XY2wjdTZLT1RsdTJtNGc
4.15 – 4.16 https://drive.google.com/open?id=0ByqN_J5XY2wjaFVmN29aTmZLT0k
The sample project has several examples of mesh painting and more. You can open the materials of any mesh to see how the Don material nodes are used to blend in effects. BP_PainterPawn is the blueprint which does all the painting for the demo project. This blueprint is somewhat complex (because of the broad nature of the sample project), but for your purposes you will simply need one of the Paint nodes and pass in the parameters relevant for your usecase/project.