Category: Intermediate Topics


Packing RGB Channel masks


Introduction

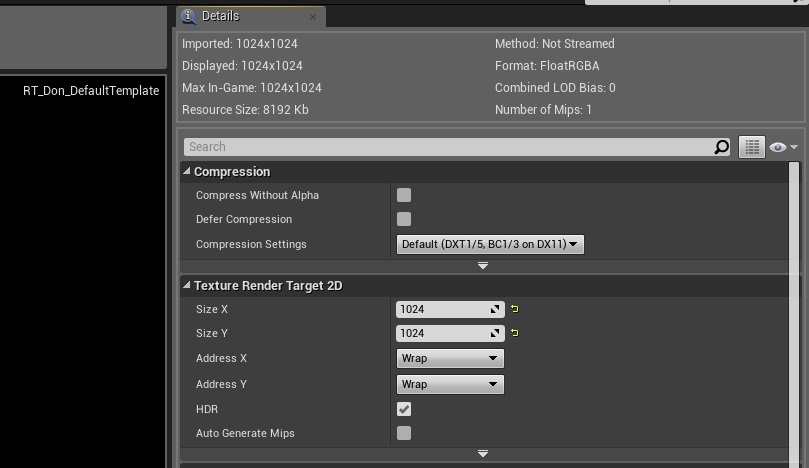
While the plugin supports multi-layer effect channels for creating multiple, independent effects per material, each effect layer will cost you a separate texture in memory.

Therefore, intermediate and advanced users may want to pack multiple effects along R, G and B allowing you to generate three effect layers for the cost of a single texture.


The Additive Render Brush

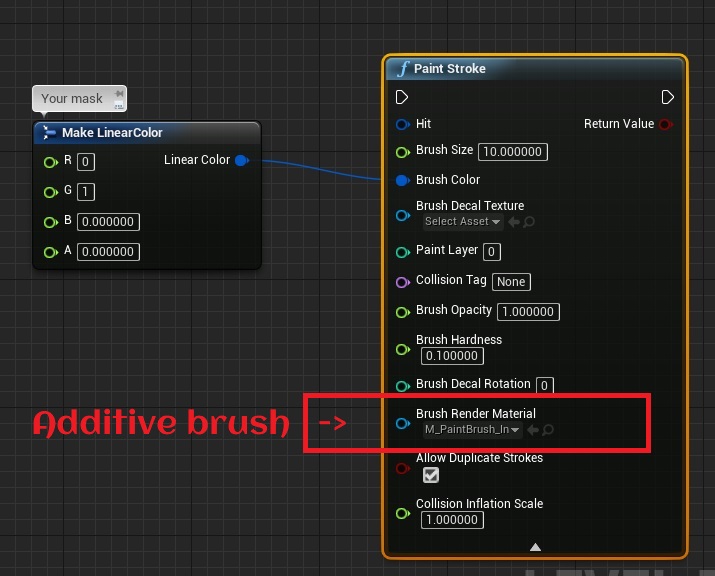
The plugin’s default render brush is an “alpha-composite” brush; convenient for a number of purposes, but not for RGB packing.

So the first thing you need to do is to override the render brush while painting with the plugin’s additive brush named M_PaintBrush_Inst_Additive (you’ll find this inside “DonMeshPaintingContent/Mateirals/RenderBrushes” after enabling “Show Plugin Content” in your Content Browser).

Here’s an example of a Paint node that is explicitly specifying the additive brush:


Inside Your Material

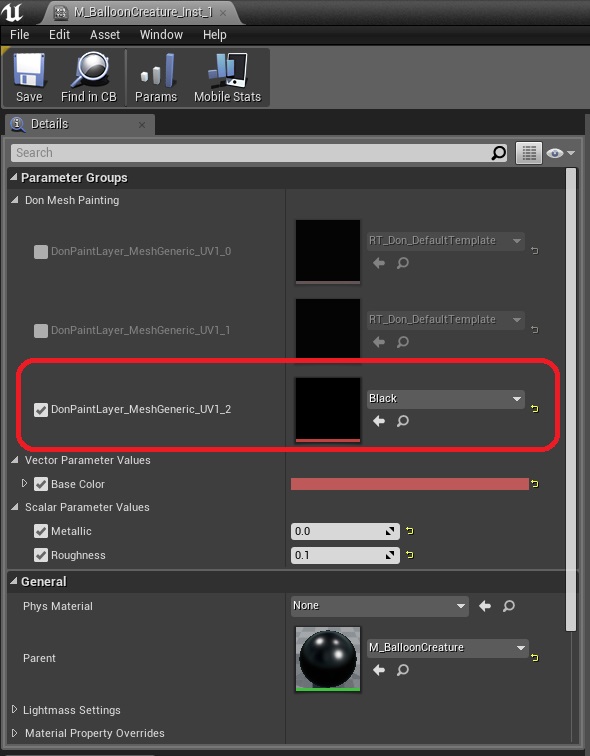
Now let’s take a look at how to use our RGB masks inside a material.

Here is an example from the sample project’s landscape material; Lava, Water and Ice are all packed via the R, G and B channels respectively:

Note:- The alpha channel cannot be used with the additive brush for packing any information. It’s just the way the blend mode works.


Changing the resolution of Paint Textures


Introduction

You may want to either increase or decrease the resolution of your paint textures depending on your usecase and overall goal.

This article explains where you need to make these changes.


Understanding Templates

Every UV node offered by the plugin has a corresponding template asset associated with it. The template is a simple render target whose properties are used as metadata for all the dynamically created textures (/RTs) for a given node.

To change the texture resolution of a UV node you need to open the template associated with it and manipulate the desired properties on that asset.

RT_Don_DefaultTemplate is the template used by nearly all UV nodes in the plugin (except for the world-space ones). Just open the asset from “DonMeshPaintingContent/Textures/RenderTargets” (you’ll need to enable Show Plugin Content in your Content browser to see this) and change the resolution as desired. The default resolution of this template is 1024×1024.

For the world-space nodes you’ll need to open the individual templates for each node which you can find inside the material function.  For example, if you’re using Don_World_Space_XY you’ll need to open the corresponding render target inside DonMeshPaintingContent/Textures/RenderTargets/WorldSpace/RT_Don_WorldSpaceXY_Layer0 and so on.


But I want a different resolution for each usecase/material…

This is possible too. Just duplicate your UV node of interest and point the texture object inside it to a new template prepared by you. As long as you leave the texture object paramater names and everything else intact, the plugin will pick up your new template and you’ll be good to go.

A quick suggestion on naming convention: you might want to rename your new UV nodes as Don_Mesh_Paint_UV1_2k, Don_Local_Space_XY_4k and so on to keep things organized.


Disabling Paint Layers On Material Instances


The problem

Normally, textures are generated only for materials which have an appropriate Don UV node  (see material functions ) in them.

However, if you’re using a master material that is configured for painting, now all the child material instances immediately become eligible to receive paint (at a cost of one texture, per paint layer, per material instance).

Consider the standard Unreal mannequin which has a parent material M_UE4Man_Body with two material instances – one of which is M_UE4Man_Body_Inst (for the body) and the other is M_UE4Man_ChestLogo_Inst (for the chest). The chest logo is so tiny that you’ll almost never want to allow such a material to receive paint (and thus generate a texture).


The Solution

Fortunately, there is a simple solution for this. Open your material instance and look for a texture parameter corresponding to the UV node you placed. Eg: if you’re using Don Mesh Paint UV on Layer 0 and UV Channel 0, you’ll see a parameter named DonPaintLayer_MeshGeneric_UV0_0.

Just overwrite this parameter to any texture (like the default Black texture available in the Engine content) and it will no longer receive paint.

The plugin expects the default value for these to point to any template Render Target (which it uses to infer paint resolution, etc) and if it sees that you have overridden it to a texture, it will simply ignore the material and move on to the next one.

Here’s an example from the sample project’s “Balloon Creature”:

In the image above we are excluding only the paint layer 2 for mesh-space painting from generating paint textures. We are still interested in listening to paint layers 0 and 1 for mesh-space, or even additional layers in local/world space, all of which can operate simultaneously.

To keep your texture memory usage to a minimum it is highly recommended to go through your materials and exclude instances which have no business in receiving paint, from doing so. This is especially true for complex characters which may have several materials, not all of which you’ll want or need to paint over.