Search Knowledge Base by Keyword
Introduction
Paint Blob Collisions are a lightweight solution for pixel-driven gameplay collisions that can help your A.I. react to painted areas, modify the behavior of certain parts of a mesh, tag landscape areas with properties that affect gameplay, etc.
The sample project includes examples such as painting lava traps that deal damage to characters, shooting projectiles through holes, modifying A.I. behavior via painted cues (eg: telling the A.I. jump across holes or water), creating blast holes on floors that characters can fall through, etc.
This article will briefly discuss the Blueprint(/c++) nodes needed to get you started. Studying the examples in the sample project is recommended.
Step 1) Creating Collision Tags
Collision tags are created at the time of painting your effects. You simply need to choose a name for whatever gameplay property the collision is used for and send that over to a paint node. Here’s an example that assigns a “Lava Trap” collision tag to a blob of paint:
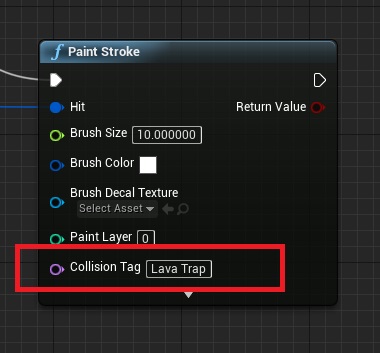
Your brush size (typically measured in world space units) determines the extent of the paint collision. With this in place, we can now query any world space location around this blob and use it to deal damage to characters/A.I./etc.
For more information on using the Paint Stroke node see the Paint Functions reference page and also the Quick start guide.
Step 2) Querying Collision Tags
Unlike Unreal’s physx collision which has the ability to notify you whenever a collision takes place (on account of its deep integration with actor movement/translation), Paint blob collisions currently require you to manually query collision at suitable time intervals. This can be as infrequent as when your actor hits another mesh (and you receive a OnComponentHit notification, which is the typical workflow for portals/projectiles/etc) or as frequent as every tick (n.b. the query functions are extremely fast) for allowing players to paint rivers of lava that deal instant damage to anything in its vicinity.
Going back to the previous example of a Lava trap, here’s how you can use a Query node to find out whether a given location (such as a character’s feet) is touching our lava:
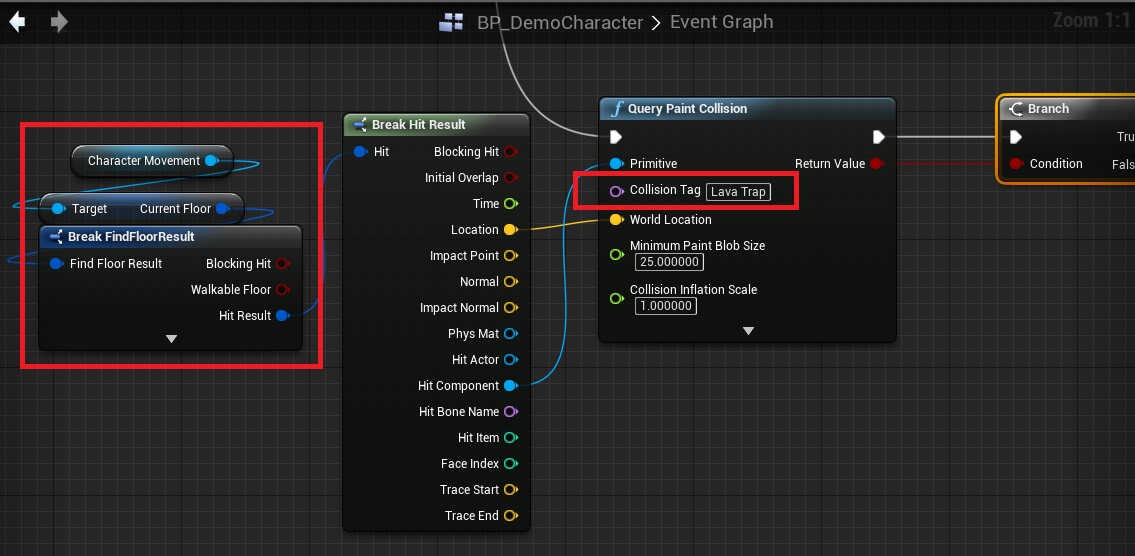
Observe how this example uses the Character’s current floor to extract both the floor location and the primitive surface (eg: a landscape). By setting a minimum blob size that is high enough, we can ensure that the condition triggers only when the lava blob is beyond a desired size.
If the query function returns true, we can now do things like dealing damage to the character, splashing lava on its legs (the sample project does this using the Paint Stroke At Component node), etc.
Open the sample project’s BP_DemoCharacter blueprint and study the “Paint Collision Check” event to see this in action.
As the sample project has multiple usecases to satisfy, it uses the advanced “Query Paint Collision Multi” node which allows multiple simultaneous queries, bucketing of queries by blob size and more.
Firing Projectiles Through Holes
The plugin comes with a ready-to-use portal projectile component that is fully compatible with all your existing projectiles!
Just reparent your projectile to the “Don Smart Projectile Component”, add list of “Paint Portal Names” and you’re good to go. The portal names are just the same collision tags you passed earlier while painting your portals with the paint nodes.
The size of your projectile will be automatically detected using the root component of your projectile actor (it needs to be a collision body like Unreal’s FPS template projectiles). This size will be used to determine the minimum paint blob size needed for passing through.
Advanced Usecases
For more advanced examples check out the “Paint Collisions” section of the sample project.